Sunday, September 9, 2012

Yummy Snacks for the Busy Gluten Free Vegan

With Fall beginning, and school starting, I'm getting asked a lot of questions about healthy snack ideas that are quick, easy, and portable.

Well... I have been so busy lately, feeling like I'm always running to one place or another. So, with limited time to spend in the kitchen myself, I have recently become very experienced in the art of on-the-go snacking! So, I thought I'd post a few of my go-to yummy snacks, no cooking required! (only some minimal preparation)


  1. Apple wedges spread with or dipped in almond butter.
  2. Celery filled with soy cream cheese and cubes of pineapple and mango.
  3. Chocolate vegan pudding pot sprinkled with shredded coconut and raspberries.
  4. Hummus or salsa with veggie sticks.
  5. Homemade trail mix (throw some nuts and dried fruit together & maybe even some dairy free choc chips for an extra little bit of a treat).
All healthy, all yummy, all quick and easy! Enjoy! :)

Monday, September 3, 2012

Salted Caramel Sauce

This is what healthy frozen dessert dreams are made of.... YUM! It just happens to be raw as well as delicious too.
 
 
Ingredients:
  • 1 cup Medjool dates
  • 3/4 cup water (or 1 cup if you are leaving out the liquid sweetener)
  • 1 1/2 tablespoons agave nectar or maple syrup (if you are on a strict raw diet it's probably a good idea you leave this out)
  • 1/4 teaspoon fresh scraped vanilla beans or gluten free vanilla extract
  • pinch of salt
 
Directions:
  1. Put all ingredients in a food processor and whizz up until smooth. Its that simple!
I served mine over vegan vanilla ice cream with bashed up almonds and dairy free chocolate sprinkled over the top. I can recommend it, it was delicious! Who would have thought caramel could be so healthy? :)


Why not serve it with my Native Foods Cafe inspired Boogie Bars and dairy free vanilla ice cream? Banana, Caramel, Chocolate Chips, Vanilla, Oats, Almond, Coconut.... what a combination!

Sunday, September 2, 2012

'Boogie Bars', Peanut Butter Parfait, & Native Foods Cafe

This recipe post is inspired by a visit to Native Foods Cafe, LA. 'The Boyfriend' and I go there a lot, too much probably really, but the food is just too darn yummy! Everything on the menu is vegan too, & labeled when gluten free, which makes ordering a lot simpler.


We are big dessert people, and have even been known to have dessert for dinner on more than one occasion. Practically every time we go, (after his burger AND chili cheese fries... man that boy can eat) he always orders a 'Boogie Bar' or 'Peanut Butter Parfait', which is basically crumbled boogie bars (a banana-y bread-y type cake) layered with creamy peanut butter filling and chocolate chips. Take a look... don't they both look amazing?


He loves them! I think they look super yummy too, and I always have an urge to nibble on them for a quick taste. But, unfortunately the gluten in the boogie bars means that celiacs need to keep away. Luckily, Native Foods Cafe serve their desserts in little to-go- containers, so we always get me some vegan ice cream on the way home, and eat dessert back at the apartment.

So, after months of admiring them, I decided to get myself in the kitchen and make myself some gluten free celiac friendly versions! Here goes...    (Thank you to the Native Foods Restaurant Cookbook for giving me an idea of the sorts of ingredients I should be including, I wanted to get it as close tasting to the real thing as I could).

For the Boogie Bar:
 
Ingredients
  • 1 cup G/f flour mix or I've used a 1/2 cup buckwheat flour & 1/2 cup brown rice flour (either works, it's just personal preference).
  • 1/2 cup gluten free oats
  • 1/2 tablespoon gluten free baking powder
  • 1/4 teaspoon salt
  • 1/3 cup shredded coconut flakes
  • 1/2 cup almonds
  • 1/2 cup vegan chocolate chips
  • 1 cup maple syrup
  • 3oz silken tofu
  • 1 ripe banana
  • 1/4 cup canola oil
  • 1/2 tablespoon gluten free vanilla extract

 Directions: 
  1. Pre-heat the oven to 375 degrees, and line a loaf pan with baking parchment paper.
  2. In a food processor, blend together the maple syrup, tofu, banana, oil & vanilla until smooth, set aside.
  3. In a large mixing bowl, combine the flour, oats, baking powder, salt, almonds, coconut, and chocolate chips, until evenly mixed through.
  4. Pour the pureed ingredients, into the flour mix and stir together to form a batter.
  5. Transfer the boogie bar batter into the lined loaf pan. Bake for 35-40 mins, until lovely, yummy, and golden. (turn it round half way through to make sure it cooks evenly).
  6. Let it cool, and then cut into bars. Serve. YUM! :)
For an optional topping to serve, spoon 1 tablespoon almond or peanut butter blended with 1/4 teaspoon cocoa powder on top of the bar,  and then sprinkle with 1/2 tablespoon broken up almonds. (The topping is per bar... not the whole cake. It's best making the frosting right before you eat the boogie bar, the cake can be wrapped and stored)
 
If you want to turn your Boogie Bars into the Peanut Butter Parfaits.....
 
Ingredients:
(to make 2 parfaits)
  • 2 boogie bars
  • 1/2 box firm silken tofu
  • 1/3 cup peanut butter
  • 1 tablespoon agave nectar or maple syrup
  • 1/4 teaspoon gluten free vanilla extract
  • 2 tablespoons vegan chocolate chips
 
Directions:
  1. Blend all the ingredients, apart from the chocolate chips, together in a food processor, until smooth & creamy. Place in the refrigerator for about 1 hour.
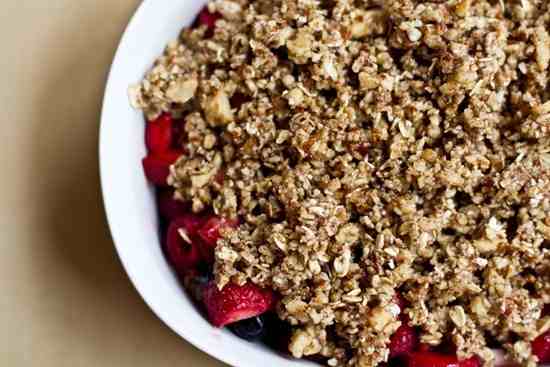
  2. Break up the boogie bars, and crumble about 2/3 of them into the bottom of 2 dishes. Sprinkle on a few chocolate chips.
  3. Divide the mousse mixture between the two dishes.
  4. Sprinkle the rest of the choc chips and boogie bar crumbles on top of the peanut butter mousse, and return the dishes to the refrigerator to chill until serving.
EAT, ENJOY, AND BOOGIE ON DOWN! :)


Saturday, September 1, 2012

The Yummiest Blueberry Pancakes

What's a girl to do after an early morning weekend spin class and power yoga session? Why, make a yummy gluten free, vegan pancake brunch of course!


 I love, love, love pancakes, and these are so light & fluffy! They are sure to make you smile :)

Be warned, this recipe makes quite a large batch.... we like leftovers in our apartment! I always make more and wrap the extras up. Also if my lovely boyfriend comes over with his gorgeous new puppy, she always seems to get her tiny paws on a couple, so a few extra can come in very useful.  They taste so good cold or popped in the toaster the next day. Pancake & almond butter sandwich anyone?
 
Ingredients:
  • 1 cup buckwheat flour (or groats processed into flour)
  • 1 cup brown rice flour
  • 1/2 cup gluten free oat flour
  • 2 teaspoons gluten free baking powder
  • 1 banana
  • 1/3 cup applesauce
  • 2 tablespoons maple syrup (to sweeten, agave nectar would work)
  • 1 1/4 cup unsweetened vanilla almond or soy milk
  • 1 teaspoon gluten free vanilla extract
  • 1 cup blueberries
  • extra blueberries, banana slices, & maple syrup to serve (optional)

Directions:
  1. Preheat a large non stick skillet over a medium heat.
  2. In a a large bowl mix together the 3 flours and the baking powder until fully combined.
  3. Pour the milk, vanilla, and syrup into the bowl, and whisk the batter until smooth and lump free.
  4. Mash the banana with the applesauce, and then fold it into the pancake batter.
  5. Lightly grease the skillet (I used Earth Balance Spread), and then ladle in a dollop of batter (about 3 1/2 inch diameter).
  6. Sprinkle some blueberries on the top of the pancake. (I prefer adding the blueberries this way as it stops the pancakes turning overly purple, and it means you can make sure all the pancakes are loaded with blueberries. (A few months ago, I had a batch with one sad pancake containing only one lonely blueberry... my room mate wasn't too impressed, so she got some extra fake bacon to make up for it). 
  7. Cook until bubbly on the top (slightly more bubbles than the pic), and then flip. Cooking the other side for a couple of mins, keeping peeking at it to check it's not browning too much. Golden brown is good, burnt is bad! These hold together surprisingly well for vegan, gluten free pancakes,but you still need to be gentle when flipping.
  8. Repeat until the rest of the batter has been used.
  9. Serve with extra blueberries & banana slices, and some warm male syrup drizzled on top. YUM :)
 
Feeling extra hungry, or wanting an extra special treat? Cook up a side of fake-bacon... it tates so yummy on top of the pancakes and all maple syrupy! Be sure to check the label though, quite alot of vegan meats contain wheat-gluten.
 
If you're looking for other brunch ideas, try my Berry French Toast. Can you believe french toast can be gluten free and vegan? It's yummy too (even if i do say so myself) ;)


Friday, August 31, 2012

Peanut Butter Cashew Cookie Bites

My Chocolate Chocolate Chip Coconut Bites have been so popular (both in my apartment & with readers), & they are so yummy, that I decided I needed to create another flavor. These little gems of rawness are sweet and oh-so satisfying and not at all naughty. They will make your skin glow & your tummy smile! And Shhh! but I think they taste even better than larabars.


Ingredients:
  • 20 Medjool dates
  • 1 cup raw cashews
  • 1 tablespoon raw peanut butter
  • 1/4 cup raw peanuts
  • 1/4 teaspoon gluten free vanilla extract or fresh scraped vanilla pod

Directions:
  1. Pulse the dates in a food processor until they become a sticky dough like consistency.
  2. Add the peanut butter and vanilla to the dough and blend until fully combined.
  3. Add the nuts, and pulse again a few times, until they are evenly blended through. Don't over process, you want them still a bit crunchy. They aren't as fun to eat if the nuts are processed too finely.
  4. Transfer the dough to a bowl for the fun part, messy (& a tiny bit sticky)... but fun! Break of small chunks of the dough and roll them into bite size balls, placing them on a baking sheet.
  5. Refrigerate until set.
  6. Enjoy! :)

Like these? Why not turn them into Reeses Peanut Butter Cup Cashew Cookie Bites by adding 2 tablespoons raw cocoa powder to the food processor with the peanut butter.

Thursday, August 30, 2012

Baked Oatmeal Raisin Bars

I always try to have a batch of these (somehow chewy & crunchy) oatmeal bars baked up, they are great for snacks, or on the go breakfasts if you're in a rush. They have no sugar either so they are so much healthier than store bought cereal or granola bars. Try them as an alternative to cookies with a glass of almond milk too!


Ingredients
  • 3 cups gluten free oats
  • 1//2 cup almond butter
  • 1/4 cup chopped almonds
  • 3/4 cup raisins
  • 1/4 cup chopped dried apricots
  • 1/3 cup honey or maple syrup (some vegans don't eat honey)
  • 1/2 teaspoon gluten free vanilla extract

Directions
  1. Preheat the oven to 350 degrees.
  2. Line a shallow square baking pan with baking parchment paper.
  3. Mix together all the ingredients in a bowl, and press firmly into the baking pan.
  4. Bake for approximately 35 mins or until golden brown, turning the pan around halfway through.
  5. Let cool for 5 mins, cut the bars to whatever size you fancy, and then let them completely cool before storing them in your cookie jar!
Why not try out your own flavor combinations? Pecan & maple syrup? Chocolate chip & cranberry? Peanut butter & banana? The chocolate chip one is so yummy served warm & gooey with vegan ice cream for a dessert. :)

Wednesday, August 29, 2012

Chocolate Shake

Smooth, thick & 'ice'creamy, chocolately, and oh so yummy! oh and can't forget... HEALTHY!


Ingredients:
(makes 1)
  • 1 frozen banana
  • 1 cup unsweetened vanilla almond/soy milk
  • 1 tablespoon raw cocoa powder or carob (more if you like it extra chocolately!)
  • 1/2 tablespoon raw peanut butter 
  • 1 teaspoon gluten free vanilla extract
  • Sprinkling of carob or vegan choc flakes (optional)
Directions:
  1. Place the frozen banana in a food processor, and pulse until it resembles frozen soft serve ice cream. (don't whizz it up so much it melts).
  2. Add all the other ingredients, and whizz until fully combined. It's that simple! If you want it even thicker add an extra half tablespoon peanut butter).
  3. Pour into a chilled glass, pop in a straw (or a spoon might be more appropriate really), sprinkle on a few carob or vegan chocolate flakes and serve. :)
To make it a thick and 'ice'creamy vanilla shake, leave out the cocoa powder and add an extra half teaspoon of vanilla extract. If you need to make it a tiny bit sweeter... a teaspoon agave nectar or sweetened vanilla almond/soy milk will do the trick!

I got super excited today, as the rock star of an actress, Dawn Olivieri, asked me on twitter if I knew how to make a vegan malt shake. I love that people are getting as excited as me over these recipes. So here goes... If you want a malted milk shake, use this recipe, omitting the peanut butter and using 1 1/2 tablespoons barley malt syrup or powder extract instead. This does contain gluten though... so it's not suitable for celiacs, or for people with a gluten allergy.... sorry! But celiacs can still enjoy shake without the malt.... it still tastes reallly really good! :)
Gym bunnies could also add a scoop of vegan/ gluten free protein powder for a yummy pre- or post- workout snack!

Monday, August 27, 2012

Banana Cream Pie

Craving pie? Well look no further! This Banana Cream yumminess is for you. It's actually good for you as well, so you can indulge with non of the naughty-ness. It's so healthy, you could even have it for breakfast! Raw, and packed full of fruit & nuts... your skin will glow, your step will be springy, & your smile will be beaming! :)


Ingredients:-
For the pie crust:
  • 1 1/2cups medjool dates
  • 1 cup almonds (walnuts or pecans work too)
  • 1/2 teaspoon maple syrup
  • 1/2 teaspoon freshly scraped vanilla pod
For the cream filling:
  • 1 1/2 cups cashews (soaked in water for 4 hours)
  • 1/4 cup water
  • 2 teaspoons vanilla
  • 2 small ripe bananas
  • 2 tablespoons shredded unsweetened coconut
  • 3 tablespoons maple syrup
For the topping:
  • 2 bananas
Directions:
  1. Place the dates and almonds in a food processor, and pulse until fine.
  2. Add the vanilla and maple syrup and pulse again until mixed in.
  3. Press the almond mix into a pie pan, forming  a crust. Place into the refrigerator while you make the filling.
  4. Drain the cashews, place them in a food processor with the water, and blend together until smooth, scraping down the sides as needed (it should take about 3 mins).
  5. Add the vanilla, coconut and maple syrup, blend until combined.
  6. Slice the banana, add that to the food processor and blend again until fully combined, it should be creamy and very smooth.
  7. Spoon the filling into the pie crust, and spread evenly. Place in the refrigerator or freezer to set.
  8. Slice the bananas for the topping just before you're ready to serve it, (otherwise they will start to go brown) and place them evenly over the set cream filling. It's also better to portion the pie while it's still a bit chilled, as it keeps it's shape a lot better.
  9. Serve and Enjoy!  :)
Wanting to make it even more decadent and luxurious? Why not add 2 tablespoons of cocoa powder to the cream filling or sprinkle with coconut shavings to serve?! Utterly yummy and oh so good for you too.

Sunday, August 26, 2012

The Great Gluten Free Vegan Sandwich Dilemma

Those of you that have visited my blog before will know I've been vegan for a while, (vegetarian for even longer), but after my diagnosis, and the doctor making me go gluten free things started to get complicated, particularly in the sandwich department!


Problem 1.... The bread!
Always read the nutritional info and check the ingredients when you buy bread at the market or grocery store, because just because the packet is advertised as vegan or gluten free doesn't necessarily mean its both (quite a few gluten free breads have egg in). But there are still plenty to choose from, corn tortillas and buckwheat or millet bread rocks! Or, why not forget the bread and make a wrap using collard greens or lettuce instead?! (it's lower carb too).


Problem 2.... The filling!
When I was first diagnosed, I found it so hard to find yummy fillings for sandwiches that were both vegan and gluten free, especially as most vegan meat substitutes are made with wheat gluten. So, I have to admit, Peanut butter and Jelly quickly became my go to option. But, however yummy, my trusty pb and j quickly got boring. So here are a few other sandwich ideas I've tried out...
  • Burger patty spread with hummus and salad (tastes good warm and cold). Amy's Kitchen do a great gluten free vegan 'Bistro' burger, their 'Sonoma' version is also v/g-f .
  • Roasted Mediterranean vegetables, (eggplant, zucchini, peppers, onion, mini tomatoes).
  • Soy cream cheese with mango or grape.
  • Mashed roasted butternut squash, garlic, sauteed red onion and black pepper.
  • For a variation on the classic PB and J, I love almond-nut butter, grilled banana, and my blackberry chia jelly.
  • Bean Chili with grated vegan cheese.
Or, of course, there is the best kind of sandwich.... THE ICE CREAM COOKIE SANDWICH!


Thursday, August 23, 2012

Sweet Apple Kugel & '2 Broke Girls'

A good giggle is super good for you and I love the TV show '2 Broke Girls', (thank you CBS, you rock!) and even though I doubt Max and Caroline's cupcakes are vegan and gluten free... I still think they look delicious! (I just wouldn't be able to sample them).
 
 
But it wasn't their cupcakes and frosting that caught my attention one Monday night. It was the Kugel they were fed! It was the episode entitled...'And the Kosher Cupcakes', and Max was going nuts for the stuff! I have to admit I had never heard of it before this episode, well I'd heard of it, I just didn't know 100% what it was, and I have to say, it had me intrigued!
 
 
The Kugel didn't sound very vegan or gluten free, so, I got to work! After a few tries, some culinary magic happened. Cue my Sweet Apple Kugel.... (P.S. Thank you CBS for the '2 Broke Girls' pics)
 

Ingredients
  • 12oz vegan gluten free pasta (check the label for egg!) I used noodles but any pasta would work. Why not try kugel lasagna?
  • 1/2 cup agave nectar
  • 15oz silken tofu
  • 1 tablespoon unsweetened vanilla soy milk
  • 2 cups raisins
  • 4 medium apples (my favourites are pink ladies)
  • 1/4 cup applesauce
  • 2 teaspoons gluten free vanilla extract
  • 1 teaspoon cinnamon (and extra to dust if you fancy)
  • 3 tablespoons vegan dark chocolate chips (optional)

Directions
  1. Pre heat the oven to 400 degrees.
  2. Cook the pasta according to packet instructions and drain.
  3. While the pasta is cooking peel and cut the apples into small cubes or slices.
  4. In a food processor, blend together the silken tofu, soy milk, applesauce, vanilla extract, and cinnamon.
  5. Toss the pasta with the apple and raisins until evenly distributed. Place half of the noodle mix into a casserole dish or tray.
  6. If your using choc chips, sprinkle them over the noodles, and then cover with the other half of the pasta mix. I sandwich the chocolate chips in the middle, because I think they make an oh-so-satisfying gooey melty surprise, plus it stops them burning if some end up near the top. But,  you could always toss them with the pasta, raisins, and apple if you want them distributed through  the dessert.
  7. Pour the tofu batter evenly over the noodles making sure they are fully coated, and dust with extra cinnamon if you fancy.
  8. Bake for 35-45 mins until golden and (I can't think of a better way to describe this, so I apologise in advance) 'not sloppy'.
  9. Let cool slightly, and serve warm! YUM!
As I can't sample the regular Kugel to taste the difference, I took some to work with me for my Jewish colleague to taste test, and he said, "although it's not quite as good as [his] Bubby's [Grams], it is a close second". He said it didn't taste vegan or gluten free either. So, for a first attempt, I'd definitely call my Sweet Apple Kugel a success! It was so good, I snook some leftovers for breakfast the day after. I know what your thinking, noodles and choc for breakfast?!?! But please don't judge.. I was in a rush. And, there is some fruit in there too! :) xo

Wednesday, August 22, 2012

Chocolate Chip Pretzel Bit Oatmeal Peanut Butter Cookies

I know what your thinking... these little yummies can't possibly be vegan and gluten free, they sound too delicious!? Because even I think that, and I've baked them, (and sampled them). But they are... they really really are! (They are just as delicious as they sound too).


Ingredients
  • 2 1/2 cups gluten free oats
  • 1/4 cup gluten free flour
  • 3/4 cup (smooth) peanut butter
  • 2 tablespoons peanuts
  • 1 ripe banana
  • 1 teaspoon gluten free vanilla extract
  • 2 tablespoons maple syrup
  • 2 tablspoons unsweetened vanilla soy milk
  • 1/2 cup vegan dark chocolate chips
  • 1/4 cup vegan gluten free mini pretzels

Directions
  1. Pre heat the oven to 350 degrees.
  2. Pulse the peanuts in a food processor until they are small pieces, or put them im a zip lock and bash, and set aside.
  3. Place the pretzels in a ziplock, bash into small pieces, and set aside.
  4. Puree or mash the banana and place in a large bowl.
  5. Add the peanut butter, soy milk, vanilla, and maple syrup to the banana and mix well.
  6. Add the oats, and flour and stir through, until fully combined.
  7. Add the choc chips, pretzel bits and peanuts and stir through the cookie mix.
  8. Drop spoonfuls of dough onto an ungreased cookie sheet (I used an ice cream scoop), and bake for 12-15 mins or until golden.
  9. These taste best if you let them cool slightly and serve warm, maybe even with ice cream for an extra treat, but they will stay fresh for a few days in a cookie jar!

Hot Chocolate Banana Breakfast Quinoa

Chocolate for breakfast? Oh yes, yes, yes! This is a really yummy alternative to oatmeal in the mornings, it gives you a quick chocolate fix too... and if you're like me I need atleast 3 chocolatey hits a day!


Ingredients
  • 3/4 cup quinoa
  • 1/4 cup gluten free oats
  • 1 1/2 cups unsweetened vanilla soy/almond milk
  • 1/2 cup water
  • 1 banana
  • 2 tbsps cocoa powder
  • 1 tbsp raisins

Directions
  1. Mash or puree the banana and set aside.
  2. Put the quinoa, milk, and water in a saucepan, bring to boil, then turn down to a low heat and simmer for 15 mins.
  3. Add the oats, and simmer for a further 10mins.
  4. Stir in the raisins, cocoa powder and pureed banana until fully combined.
  5. Spoon into a bowl, and serve warm. Yummy in your tummy!
This also tastes amazing with a tablespoon of almond or peanut butter stirred through... packs some extra protein in there aswell!  Perfect for a pre- or post- workout breakfast.

Thursday, August 2, 2012

Fudgsicles

One of the best things about summer? Why, popsicles of course! And just because you're vegan and gluten free doesn't mean you can't indulge. Even if you aren't, you will still love these fudgsicles, they are super easy to make, and they are heaps healthier for you too! Bonus!


Ingredients
  • 5 bananas
  • 3 tablespoons cocoa powder
  • 2 tablespoons peanut butter
  • 1 teaspoon gluten free vanilla extract
  • 1 tablespoon unsweetened vanilla soy milk

Directions
  1. Peel and slice the bananas and freeze them in a ziplock bag for about an hour.
  2. Place all the ingredients in a food processor, and blend until they are all combined, and a suitable texture to put in your popsicle mould. It should be soft but not too runny.
  3. Spoon your chocolate banana mixture into the popsicle moulds, and freeze until set (mine took about 3 hours).
  4. Enjoy... YUM! :)


Sunday, July 1, 2012

Ice Cream Sandwich Cookies

Happy 4th July weekend conscious foodies! My roommate's family have invited us to a sort of 'potluck' cookout (complete with fireworks...of course!) to celebrate, and as gluten free, vegan options are often quite limited, I'm making these little bites of yumminess to take with us for dessert. If you're looking for yummy gluten free, vegan recipe ideas for 4th July, these Ice Cream Sandwich Cookies are most definitely for you.


Ingredients
For the cookies:
  • 1/2 cup unsweetened applesauce
  • 1 1/2 teaspoons chia seed meal
  • 1 tablespoon cocoa powder
  • 1 teaspoon gluten free baking powder
  • 1 1/2 cups teff flour (this is actually gluten free, I discovered it a few months ago at the market, I used brown as I thought it gave the cookies a nicer color)
  • 2/3 cup gluten free brown rice syrup
  • 1 teaspoon gluten free vanilla extract
  • 1 cup almond butter (I think the smooth kind works best in this recipe)
For the ice-cream:
  • 3 large bananas (peeled, sliced & frozen)
  • 3 tablespoons soy milk (unsweetened vanilla would taste really good, but normal works)
  • 2 teaspoons gluten free vanilla extract

To make the ice cream filling chocolate flavor, add 2 tablespoons cocoa powder. Or, if you have an ice cream maker, you could make my coconut milk ice-cream.

Directions
  1. Preheat the oven to 350 degrees, and line a really large (or 2 small) cookie sheet with baking parchment paper.
  2. Stir the chia seed meal into the applesauce & set aside.
  3. Sift together the cocoa powder, four, & baking powder.
  4. In a small sauce-pan over a very low heat, gently warm the almond butter, as it softens add the syrup & vanilla extract. Take the pan off the heat & stir through.
  5. Add the almond butter mixture to the dry ingredients and mix together until fully combined.
  6. Roll out your cookie dough to the desired thickness, (I like mine quite thin.. a bit less than 1cm thick. You may have to adjust the cooking time) and cut into rectangles.
  7. Arrange the dough on the cookie sheets, leaving a couple of inches between each one.
  8. Bake in the oven for 7-10mins. Do not overbake, they should still be quite soft.
  9. Let them cool, and harden slightly. If you're not assembling the sandwiches straight away you can freeze them in an air tight container or ziplock baggie, until you're ready.
  10. Take the bananas out of the freezer and place in a blender or vitamix. Pulse a few times adding in the soy milk and vanilla extract as you do.
  11. You can then either, if you like you're ice cream a more 'soft-servey' texture, make the sandwich cookies straight away, or you could re-freeze the ice-cream for a little while to let it firm up, like I did. I did however, sneak one 'soft-serve' style, because they looked too darn delicious!
  12. I then, used a cookie cutter to get the ice cream in the same rectangle shape as the cookies, assembled it between two of them, and then used a spoon, to the neaten up the sides. Repeat with all the cookies.
  13. Serve, and enjoy! YUM-my! :)

Wednesday, June 27, 2012

Rice Crispy Treats

These were always one of my favourites as a child, I used to love getting all messy making them, and sneaking tastes from the bowl when the adults weren't watching! Actually, even at 24, they are still one of my favourites, but now, I just don't have an adult frowning at me for pinching the gooey yumminess... I'm allowed to sneak tastes freely! I haven't had them for a while, I just didn't think they would be something I would be able to eat being a gluten free vegan. But, stumbling upon the gluten free rice cereal at the market got me thinking how much I missed them,  and after quite a few batches, I think I've come up with a recipe that is so yummy, you actually can't tell the difference!


Ingredients
  • 8 cups gluten free rice cereal
  • 1 cup almond butter
  • 1 cup brown rice syrup
  • 1/2 cup gluten free vegan marshmallows
  • 1 tablespoon gluten free vanilla extract

Directions
  1. Line a square/rectangle cake pan with baking parchment paper.
  2. Pour the rice cereal in a really large bowl, (you need enough mixing room not to spill any).
  3. Over a low-medium heat, in a large saucepan, combine the almond butter & brown rice syrup, stirring constantly until melted.
  4. Turn the heat down slightly, add the marshmallows, & keep stirring until melted.
  5. Take the pan off the heat, stir in the vanilla extract.
  6. Pour the melted marshmallow 'sauce' over the cereal & keep stirring until all the rice is coated.
  7. Spoon into your lined cake pan, press the mixture down, & refridgerate for about 1 hour.
  8. Cut into squares, and serve. Enjoy :)

Tuesday, June 26, 2012

Black Bean Hummus

I love hummus, and being a gluten free vegan it's one of the foods I know I'm okay to eat. It's such a quick, easy & (more importantly) delicious lunch/snack option, but I have been getting a bit bored with the regular store bought kind... our apartment consumes way too much of it! So I decided to experiment & came up with this recipe, using black beans. You will have to try it out yourself, but I think it tastes even nicer than using chickpeas. It's so yummy on a sandwich too!


Ingredients
  • 2 cloves garlic
  • 2 cups cooked black beans, drained & rinsed
  • 2 tablespoons lemon or lime juice
  • 1 tablespoon tahini (roasted sesame seed paste)
  • 1 teaspoon ground cumin
  • 1/4 teaspoon cayenne pepper (optional)
  • 1/4 cup finely chopped fresh cilantro
  • sprinkling sea salt & fresh ground black pepper
  • 1/2 small jalapeno pepper, de-seeded & chopped
  • 1 teaspoon extra virgin olive oil

Directions
  1. Peel & crush the garlic cloves, place in a food processor with the cilantro, & pulse a few times.
  2. Add the black beans and the lemon/lime juice to the food processor & blend until smooth.
  3. Place the rest of the ingredients in with the black bean mix, and process until fully combined & mixed through.
  4. It can be kept in the refrigerator for a little while in a container if needed, but it can be served straight away too. Serve with raw veggies, gluten free pitta bread, or tortilla chips.

Monday, June 25, 2012

Hot Cocoa

My room-mate has been snuggled up on our couch sick for two days, so to cheer her up I made her some of my 'not-as-naughty' vegan & gluten free Hot Cocoa. This recipe serves 1, but I doubled it so I could have some too!  This recipe is quite chocolatey, if you don't like it quite so rich, you can leave out some of the chocolate chips or use less cocoa.

Ingredients
  • 1 cup unsweetened vanilla almond milk
  • 2 tablespoons cocoa powder
  • 2 tablespoons vegan chocolate chips
  • 1/2 teaspoon gluten free vanilla extract
  • 1 teaspoon agave nectar
  • 1/4 teaspoon cinnamon (optional)

Directions
  1. Place the almond milk & cocoa powder in a small saucepan & warm over a low/medium heat, stirring constantly.
  2. Once warm, add the chocolate chips, continuously whisking until melted.
  3. Add the vanilla extract, agave nectar & optional cinnamon, stir until fully combined & the chocolate mix is steaming.
  4. Pour into your favourite mug, and serve. :)
To make this yummy 'not-as-naughty' treat extra indulgent, you can serve with vegan, gluten free marshmallows & topped with coconut cream.

Tuesday, June 19, 2012

Eggplant Parmigiana

I love love love Italian food, & Eggplant Parmigiana is one of my favourites. Although I've found it difficult to make since needing to go gluten-free, on top of already being vegan. But this recipe is so delicious, you wont be able to tell the difference! After working away from home and on location a lot recently, I really was in need of some good ol' home cookin', & this dish was perfect.


Ingredients
  • 1 large eggplant
  • sea salt flakes for sprinkling
  • 3/4 cup soy or almond milk
  • 1/4 cup brown rice flour
  • 1 cup gluten free breadcrumbs
  • 2 tablespoons vegan powdered parmigiano style 'cheese'
  • 1 jar gluten free vegan marinara sauce
  • 1/3 cup soy or almond milk
  • 3/4 cup vegan mozzarella style shreds (the brand I use is 'Daiya')

Directions
  1. Preheat the oven to 400 degrees.
  2. Slice the eggplant into 1/4inch pieces (length ways or round both work just as well), sprinkle them with the salt, & then let them sit for about 30 minutes .
  3. Rinse the salt off the eggplant & pat the pieces lightly.
  4. Combine the soy milk & brown rice flour in a large dish, dip the eggplant slices in the batter until coated fully both sides.
  5. Line a cookie sheet with parchment, arrange the battered eggplant slices, liberally sprinkle the eggplant with the gluten free breadcrumbs on both sides.
  6. Bake for around 8-10 minutes until golden and crispy, flip, and repeat.
  7. While the eggplant bakes, place the mozzarella shreds & 1/3cup soy milk in a small saucepan and warm over a low heat, stirring constantly, until combined & 'melty'. (I know that's not the best word but it's difficult thinking of another word to describe the texture).
  8. Cover the base of a casserole dish with a thin layer or marinara sauce, followed by a layer of the eggplant slices.
  9. Thickly spoon 1/2 the 'cheese' sauce on the eggplant, & then repeat the layers. Liberally sprinkle with the remainder of the gluten free breadcrumbs.
  10. Cover the casserole dish with foil & bake for 25-30mins. Uncover, & bake for another 10-15 minutes until the topping is golden brown & crispy.
  11. Towards the end of baking sprinkle with the vegan parmigiano and bake until melted & crispy.
  12. Serve with salad greens or Zucchini Spaghetti (steps 1& 2). The left overs are also super yummy for lunch the next day! :)

Sunday, June 17, 2012

Berry French Toast

Continuing on my quest for yummy gluten free, vegan dishes for my favourite meal of the day.... breakfast/brunch! I really don't need to say much about my Berry French Toast, I'm going to let it do it's own talking. Enjoy :)


Ingredients
(serves 2)
  • 4 slices of gluten free bread
  • 2 very ripe bananas, mashed
  • 1/2 cup unsweetened vanilla soy or almond milk
  • 2 tablespoons almond butter
  • 1 teaspoon cinnamon
  • 1 1/2 teaspoons gluten free vanilla extract
  • maple syrup (to serve)
  • 2 handfuls fresh berries (to serve) - I like raspberries or blueberries for breakfast/brunch
  • tiny bit of vegan spread, I used Earth Balance

Directions
  1. Add the bananas, milk, almond butter, cinnamon, & vanilla extract together in a food processor, & pulse until fully combined. If the batter is too thick, you can add more milk. 
  2. Pour the batter into a large dish & soak the slices of gluten free bread.
  3. Heat a large non stick skillet, & add the vegan spread.
  4. When the spread has melted, carefully (gluten free bread breaks up very easily) place the soaked bread in the skillet to cook.
  5. When the bottom of the bread has turned a dark golden brown (not burnt, but the darker the bread is the less likely it will fall apart), flip it using a spatula.
  6. Cook the 2nd side until just turning golden.
  7. Plate up the french toast, drizzle with maple syrup, sprinkle with berries and serve warm. YUM :)

Wednesday, June 13, 2012

Fudgey Chocolate Chocolate Banana Brownies

Because every now and then a girl just needs some chocolate, and what better way is there to indulge your sweet tooth than doing it healthily. So yummy, decadent & so chocolately it needed to be said twice :)


Ingredients
  • 1 cup banana
  • 2/3 cup unsweetened apple sauce
  • 2/3 cup medjool dates
  • 2 tablespoons almond butter
  • 1 cup agave nectar
  • 1/2 cup brown rice flour
  • 1/2 cup almond meal/flour
  • 2 teaspoons gluten free vanilla extract
  • 1/2 cup raw cocoa powder
  • 1 teaspoon xanthan gum
  • 1 teaspoon gluten free baking soda
  • 1/4 teaspoon sea salt
  • 3/4 cup vegan chocolate chips
  • 3/4 cup vegan chocolate chips

Directions
  1. Preheat the oven to 350 degrees, lightly grease a square or rectangular baking pan. I used Earth Balance Spread.
  2. Mash the banana, set aside. Pulse the dates in a food processor a couple of times (or chop very finely), and set aside.
  3. Sift the flour, almond meal, cocoa powder, baking soda, xanthan gum & salt together in a large mixing bowl.
  4. Melt 1 of the 3/4 cups vegan chocolate chips in a heatproof bowl over a pan of boiling water. Add the agave nectar & vanilla extract, stir until fully combined.
  5. Pour the melted chocolate mixture over the flour, & thoroughly mix it in.
  6. In a different bowl stir the mashed banana, almond butter and processed dates into the apple sauce. Fold this mixture into the brownie batter.
  7. Fold in the second 3/4 cup vegan chocolate chips through the brownie batter.
  8. Spoon the brownie batter into the greased baking pan, and spread evenly.
  9. Bake for about 35-40 minutes in the oven, turning them round half way through. The brownies are ready when a skewer dipped into the centre of the brownie mix comes out clean.
  10. Let them cool at room temperature for a while then enjoy! :)

Tuesday, June 12, 2012

Super Green Smoothie

Hey! I'm so sorry I've not posted in a while, but I've been so super busy with work I've not really been cooking much I could post about... let alone actually having the time to blog about it! I've been having a really exciting time recently... firstly, there was my work trip to New York, and then after just a couple of days back in my own bed on the west coast, I was back out on location working my make-up magic, and enjoying the delights 'craft services' had to offer. It feels like all I've been eating for a month is take-out food & fresh juices, very healthy takeout, but still, I'm looking forward to the idea of some good old home cookin' very soon!

One thing I did manage to make for myself (usually just before running out of the door at 5.30am) were smoothies. So here's my recipe for my super-quick, super-nutrient packed, super yummy, superfood, Super Green Smoothie. Your skin will glow, your step will be springy, and your smile... huge! Enjoy :)


Ingredients
  • 1 cup unsweetened vanilla almond milk
  • 1/2 banana
  • 1 cup spinach
  • 1/2 cup kale
  • 1 tablespoon almond butter
  • 1 tablespoon blueberries

Directions
  1. Put all the ingredients in a blender, whizz up until smooth, pour, serve. It's that simple! (It's yummy too).

Monday, May 21, 2012

Banana-berry Frozen Yogurt

Oh-my-wow!
There's every chance you may possibly polish off a full tub of this creamy frozen yogurt one go, I know I've made a solid effort at doing so before now. This dessert truly is utterly yummy. The fact it is super healthy, and even easier to make only makes it more delicious too. In fact, it's so easy to make, the only equipment you need is a freezer! (A blender would help too, but this recipe can get by without one.)


Ingredients
  • 2 ripe bananas  (the softer the better but not brown)
  • 4 pots or 1 big pot berry flavoured vegan yogurt (I used banana/strawberry flavour)
  • 1/2 cup strawberries

Directions
  1. Peel & slice the bananas. Place them in a ziplock baggie, and put them & the small tubs of yogurt in the freezer for 2-3 hours.
  2. Slice the strawberries into small chunks.
  3. Take the banana out of the freezer transfer to a plastic container & mash with a fork (this is where the blender would come in very useful). The banana slices should still be soft enough to mash, but they may need to sit out on the side for a few minutes.
  4. Empty the part-frozen yogurt pots into the container, & mash in with the bananas. (Again, a blender would be useful to do this).
  5. Stir in the strawberry chunks.
  6. Put the lid on the container, and put back in the freezer to harden.
  7. Serve with a couple of whole fresh strawberries. Enjoy the yumminess! :)

Sunday, May 20, 2012

Spinach, Tomato & Avocado Socca Pizza

One of my favourite treats for dinner time before the doctor told me I needed to go gluten free was pizza (with vegan cheese of course). I didn't make it very often though because I was very conscious it wasn't the healthiest choice, (plus I always got really ill afterwards... at least now I know why). I actually really loved it cold the next day. Please don't judge, it really is delicious! I tried indulging with store bought 'gluten-free' pizza bases instead. But I found them quite boring. I didn't really like the taste, and they kept breaking up on me, which got a bit frustrating. After all, isn't half the fun of pizza that you can pick up a slice and nibble on it?

 I went out with friends to a gluten-free cafe in LA one afternoon, and tried this amazing flat-bread type thing made from chickpea/garbanzo flour, called Socca. It was really delicious, and I could pick it up without it crumbling too! So, I got to thinking how yummy would this be if I added veggies & cheese and turned it into a pizza? And it was, it really really was! So here it is, my gluten free, vegan, 'non-crumbling' pizza.... enjoy foodies! :)

Ingredients
For the Socca batter:
  • 1 cup garbanzo bean flour (basically super-food processed chickpeas)
  • 1 1/4 cup water
  • 1 teaspoon sea salt
  • sprinkling fresh ground black pepper
  • 1  teaspoon garlic fresh crushed or powder
  • 1 tablespoon extra virgin olive oil
  • drizzle of extra virgin olive or coconut oil for the pan
For the topping:
  • 3 tablespoons organic tomato paste/salsa/sauce or pesto, whatever you fancy & have in really. I used the paste (make sure it's gluten free & vegan)
  • Handful spinach leaves
  • 2 tablespoons vegan mozerella shreds (optional)
  • 1/2 avocado sliced.
  • Whatever other pizza toppings you like or have in (some of my favourites are red onion, olives, eggplant, mushrooms)

 Directions
  1. Preheat oven to 425 degrees. Place the skillet in it to warm up.
  2. Add the oil for cooking. While the oil is heating mix the socca batter in a large bowl or jug. Try and whisk any lumps out.
  3. Make sure the heated oil is covering the whole skillet, and pour in the batter. Bake for 25-30 minutes until it turns golden brown.
  4. Take the socca out of the oven, using a plate, carefully flip the pizza crust. Put it back in the skillet and bake again for about 5 mins.
  5. Spread the pizza base with the tomato paste. Top with the sliced avocado and what ever other veggies you fancy.
  6. Lightly sprinkle the vegan mozerella shreds around, and broil until the cheese just starts to melt.
  7. Place the spinach leaves on the top & broil for 1 minute.
  8. Let cool slightly, slice into pizza wedges & serve! Or, alternatively, if you're like me eat the left overs cold the next day.

The bigger the skillet the thinner & crispier your pizza base will be. This is personal preference, but I think socca tastes better when it's slighty doughy still in the middle.

Saturday, May 19, 2012

Baked Nacho-style Kale Chips

Craving potato chips but not really wanting to induge because you don't want to be naughty? Well that will no longer be a problem with my yummy Nacho-style crunchy Kale Chips. You can indulge in firsts, seconds, & even thirds if you feel the need, completely guilt free!


This recipe is made baked in the oven, purely because not everyone owns a dehydrator. But, if you are following a raw diet, you can substitute the olive oil for the juice from 2 lemons & 1 cup of cashew nuts (soaked for 2 hours) blended together, and the vegan cheese for nutritional yeast.

Ingredients
  • 2 bunches kale
  • 2 tablespoons extra virgin olive oil
  • 1 teaspoon chilli powder
  • 2 teaspoons garlic powder or fresh crushed (both will work)
  • 1 teaspoon sea salt flakes
  • 5 tablespoons vegan parmigiano style powder cheese

Directions
  1. Preheat the oven to 350 degrees, line 2 large baking sheets with parchment paper.
  2. Wash the kale, trim & discard the stems. Tear the leaves into chip-sized pieces.
  3. Place the kale in a large bowl & drizzle with the oil. Toss the leaves with the chilli, garlic & salt, until thinly coated.
  4. Place the kale on the baking sheets in a single layer. (You may need to repeat the baking process again to avoid the kale being on top of each other, depending on how big your oven is).
  5. Bake for about 12-15 minutes until the leaves start to go brown at the edges, be careful not to let them burn as the chips will get slightly bitter. Turning them part way through.
  6. Remove them from the oven, sprinkle with the vegan cheese, and then let them cool for a few minutes to make them crunchy.
  7. Serve... & eat! :)
You could also serve the baked kale straight from the oven as a side dish.

Friday, May 18, 2012

Blackberry Chia Jam

Continuing on my quest for healthy & delicious gluten free, vegan yumminess for my favourite meal of the day (breakfast, for those of you are wondering), I found this.... Chia Jam! It is so quick & easy to make, and crazy healthy compared to store bought jams & jellies. It's raw, contains no added sugar (just the natural stuff from the blackberries), plus it has the added nutrient packed extra of the new super seed, chia!


Ingredients
  • 1 cup blackberries
  • 1 tablespoon chia seeds
  • 1 tablespoon water
  • agave nectar or stevia to taste

Directions
  • Mash the blackberries with a fork (if they are frozen, be sure to let them thaw first).
  • Transfer the fruit into a jar, mix in the chia seeds & water.
  • You may not need any but you could add a drizzle of agave nectar or a few drops liquid stevia, it just depends how sweet you want the jam.
  • Refrigerate for about an hour.
  • Toast a slice of your favourite gluten free bread, spread with your fresh homemade chia jam & serve. Delicious and oh so healthy!

If toast isn't your thing, you could have it on oatmeal, pancakes, vegan yogurt/ice cream,  or even on it's own as a snack. This also tastes amazing on one of my favourite brown bag/ picnic lunches... almond butter, grilled banana & jelly sandwich. Or as an extra treat, serve it warm & toasted, think grilled cheese meets pb & j, but a way way healthier and good for you version!


Thursday, May 17, 2012

Chocolate Chocolate Chip Coconut Bites

My 'not-so-naughty' Chocolate Chocolate Chip Coconut Bites... indulging my sweet tooth healthily & beautifully.


Ingredients
  • 1/2 cup raw cashews
  • 15 medjool dates
  • 2 tablespoons unsweetened raw cocoa powder
  • 1/4 cup vegan chocolate chips
  • 1/4 cup almonds
  • 1/4 cup unsweetened coconut flakes

Directions
  1. Process the dates in a food processor until they become a sticky dough like consistency.
  2. Add the nuts & cocoa powder, and pulse in the food process until evenly mixed. Don't over process, you want them still a bit crunchy. They aren't as fun to eat if the nuts are processed too finely!
  3. Transfer the mix to a bowl, add the chocolate chips & coconut and mix until combined fully.
  4. Now it's time for the fun bit, slightly messy, but very fun all the same. Break off chunks of the dough and roll into bite-size balls, placing them onto a baking sheet.
  5. Refridgerate until set, if you can resist eating them straight away.
Utterly yummy, and oh so good for you. Your skin will glow, your step will be springy, & your smile will be beaming! :)

If you like these little gems... you will love my Peanut Butter Cashew Cookie Bites!

Zucchini Pasta with Pesto & Tomato

YUM-MY!


Ingredients
(serves 2)
  • 2 large zucchini
  • Handful mini tomatoes, halved
  • 2 tablespoons vegan basil pesto (double check its dairy & gluten free)
  • 1 clove crushed garlic
  • Sprinkling freshly ground black pepper
  • Vegan cheese (I used the powder-like parmigiano stlye kind but vegan mozzarella shreds would work well too)
  • Drizzle of extra virgin olive oil

Directions
  1. Take the top and bottom off the zucchini, & then carefully slice it into your pasta style strands. I did mine a similar size to spaghetti, but I've made more tagliatelle ribbons before too.
  2. Sprinkle the zucchini with freshly ground black pepper, and place in a steamer for about 3-4mins until it's soft.
  3. While that's cooking, heat the oil in a skillet & saute the tomatoes with the garlic (taking care not to let the garlic burn).
  4. Transfer the pasta to a bowl & gently toss it with the pesto, (trying not to break up the pasta), add the tomatoes & garlic.
  5. Divide the pasta into dishes & sprinkle with cheese, serve warm.
Simple! An Utterly Yummy (& majorly healthy and good for you) dinner made in 15 minutes, that will make your stomach smile. Enjoy foodies :)


Wednesday, May 16, 2012

Buckwheat Breakfast Crumble

Breakfast is most definitely my favourite meal of the day! It's also probably the meal that has got most predictable for me since going gluten free. I seem to have fallen into a pattern of having pretty much the same thing most mornings. My go-to options have become gluten-free toast with almond or cashew butter, gluten-free oatmeal with blueberries or a fresh juice (preferably of the green variety). Not that there is anything wrong with any of these options, infact they all super yummy & chock- full of goodness.... I just fancied a bit of a change!

Cue, my Buckwheat breakfast crumble.


I'd not tried raw buckwheat groats before, but I'd heard very good things about them. They are full of fiber, minerals & protein don't you know?! I also wanted to try something a bit diffrent & innovative not just using the regular gluten- free subsitutes. It took me a couple of attempts to get the groats to the right consistency the first time I made it, but once I had perfected them, this quickly became my new favourite breakfast/brunch dish! So, here it is....

Ingredients
(this serves 1, but you could just as easily double or triple it & serve it 'family-style' in a bigger dish)
  • 1/2 banana
  • 2 tablespoons raspberries
  • 3 tablespoons blueberries
  • 4 or 5 chopped strawberries
  • 2 tablespoons gluten-free oats
  • 1 tablespoon raw buckwheat groats
  • 1 tablespoon almonds
  • 1 tablespoon raw organic honey
  • 1 tablespoon raw almond butter

Directions
  1. Rinse the raw buckwheat groats, then soak them in water over night.
  2. Rinse them again, let them dry, and put them in a food processor.
  3. Add the gluten-free oats, almonds, & honey to the food processor, pulse it until just combined, (you don't want the mixture processed too fine).
  4. Slice the banana, and top with the berries in a bowl.
  5. Spoon the almond butter ontop, (you can stir it into the fruit if you like too).
  6. Sprinkle on the buckwheat/ oat mixture and serve.

I'm not on a strictly 'raw food' diet, however I do like experimenting with raw recipes every now and and then. This was one of those experiementations. But equally, it could be baked in the oven and served warm. I just make it like this for it's convinience because I'm always rushing around in the mornings to yoga or work, and don't always have time to bake something. It would also be so delicious served as a healthy dessert with my Coconut ice cream melting over it.

Let me know what you think in the comments below xo

Monday, May 14, 2012

Cheesy Tofu Scramble

I went out with some friends for brunch at the weekend, and had the most delicious tofu scramble... I was truly inspired, so I decided to create my own version.


Ingredients
  • 1 block firm tofu
  • 1 tablespoon coconut oil (other oil would work too, I just prefer coconut oil for the health benefits & taste)
  • 1/2 medium red onion
  • 5 mini tomatoes
  • 1 handful chopped spinach
  • 4 small mushrooms
  • 2 tablespoons vegan cheddar cheese (I use 'Daiya' cheddar style shreds)
  • 2 tablespoons nutritional yeast
  • 1 teaspoon crushed fresh garlic
  • freshly ground black pepper


Directions
  1. Press & drain the tofu between two plates to get most of the moisture out (it takes about 10 mins), crumble it into small cubes.
  2. Melt the coconut oil in a skillet. Add the onion & mushrooms.
  3. When they are a nice golden color (don't let them get too brown), add the garlic and reduce the heat.
  4. Add the spinach & tomato to the skillet first, and then the crumbled tofu.
  5. Sprinkle on the nutritional yeast and the freshly ground black pepper.
  6. Stir fry for 3-4 mins until the scramble is cooked through, sprinkle on the cheese (keeping the scramble on the heat until it melts) and serve. At the cafe, it was served with fresh fruit on the side.
  7. Enjoy foodies!

Saturday, May 12, 2012

No-bake Chocolate Chip Cookie Dough

Who doesn't love milk & cookies? And (if I may say so myself) my gluten free, vegan nuggets of loveliness are delicious ones! Both chewy and crunchy, these taste even better dipped in a glass of almond milk, and the fact they are super healthy only make you love them more.

These are already no-bake but if you are following a 'raw' diet, they can be easily adapted. I made them for one of my friends, substituting the vegan chocolate chips for raisins. This version of my cookies works really well for breakfast when your in a bit of a rush too. You could also add a couple of tablespoons cocoa powder if you're wanting a much needed chocolate fix without the choc chips!


Ingredients
  • 1 cup gluten free oats
  • 1/2 cup medjool dates
  • 1/4 cup almonds roughly chopped (optional)
  • 1 teaspoon ground cinnamon
  • 1 tablespoon honey
  • 1/2 cup vegan chocolate chips (more or less depending on how chocolatey you like it)
  • Glass of almond milk to serve

Directions
  1. Food proccess or blend the medjool dates, add the almonds & repeat until mixed evenly through.
  2. Add the gluten free oats honey, and cinnamon to the mixture and pulse until just combined.
  3. Pour the cookie dough mix into a bowl, add the chocolate chips and combine (with a spoon if you don't like to get messy).
  4. Shape the dough into bite-size balls or alternatively you can flatten them into patties, placing them on a lined baking sheet.
  5. Refridgerate for about an hour, then.... enjoy!

Thursday, May 10, 2012

Butternut Squash and Cashew Nut Roast

Butternut squash is one of my favourite veggies, and not eating meat or dairy, a main source I get some protein from is nuts. YUM! (This is a great holiday recipe too, I had it at both Thanksgiving and Christmas)


Ingredients
Makes 2 portions
  • 1/2 large onion finely chopped
  • 1 clove garlic crushed
  • Extra virgin olive oil or nut oil (for roasting)
  • 1 cup peeled, de-seeded & cubed butternut squash            
  • 3/4 cup raw cashew nuts chopped roughly               
  • 1/4 cup raw peanuts chopped roughly                   
  • sage (to taste)
  • sea salt & fresh ground black pepper

Directions
  1. Pre-heat the oven to 420 degrees.
  2. Drizzle the squash with some oil, sprinkle with salt & pepper, the optional sage & roast for 30 mins, until it starts to look slightly golden.
  3. Fry the onion until golden brown in a skillet (using a drizzle of the oil), remove from heat & add garlic, let cook slightly taking care it doesn't burn.
  4. Turn the oven down to 370 degrees.
  5. Lightly mash the onions & garlic together with the butternut squash.
  6. Add the chooped cashews & peanuts, combine well, form into two patties about 1inch tall.
  7. Bake for 60mins at 370 degrees. Flip the patties half way through, covering with foil if they start to get too brown.
  8. Allow the patties to cool slightly before serving to avoid them breaking up.

Wednesday, May 9, 2012

Chocolate Chia Pudding

Move over every other seed on the shelves at the market, chia are here and they mean business!
These wonderful little seeds are still fairly new to me, but with them being packed with fibre, omega-3s, protein, & anti-oxidants, how can a vegan, foodie, gluten-free girl resist?!


Ingredients
(serves 4)
  • 2 cups almond milk
  • 2/3 cup chia seeds
  • 1/2 teaspoon pure vanilla extract (be sure to check it's gluten free)
  • 2 tablespoons cocoa or carob powder (more or less depending on how chocolatey you like it)
  • agave nectar or honey to sweeten (to taste)
  • Rasberries to garnish (mint leaves or coconut shavings would look/taste cool too)

Directions
  1. Combine the almond milk, chia seeds, & vanilla in a bowl, or shake in a glass jar (making sure the lid is on tight).
  2. Refridgerate for 4-8hrs (overnight is best).
  3. Stir in the cocoa or carob powder, refridgerate for 1-2h).
  4. Stir, spoon into bowls, drizzle with agave nectar or honey if you fancy, & decorate.
  5. EAT and delight in the yumminess.
Little tip- feeling a chill? warm it through! It's delicious hot too.

Tuesday, May 8, 2012

Salt & Vinegar Roasted Chickpeas

This are my yummy alternative to potato chips, and they are so much healthier & better for you too. I have to limit myself, & I've only made them a couple of times, purely because I can't stop popping them in my mouth!


Ingredients
  • 2 cups chickpeas (I used canned- Trader Joe's & Wholefoods both sell them, but I guess dry would work just as well. Make sure you soak and prepare them according to the packet instructions).
  • 3 cups white vinegar
  • 2 tablespoons extra virgin olive oil
  • 1 tablespoon coarse sea salt (more or less depending on personal taste)

Directions
  1. Preheat the oven to 420-425F.
  2. Place the vinegar & chickpeas in a pot and bring to the boil. Add an extra sprinkling of sea salt & remove from the heat. Let the chickpeas marinate for 30-40 mins.
  3. While the chickpeas are marinating line a baking sheet with tin foil (or you could use a disposeable foil tray).
  4. Drain the chickpeas, taking care not to bash them around too much, &  place them on the baking sheet.
  5. Drizzle with olive oil & sea salt, toss them around until they are fully coated.
  6. Roast them in the oven for 20mins.
  7. Take them out, toss them around, roast for another 20mins. Keep a lookout as you dont want them to get burnt. Crunchy is good, burnt isn't!
  8. Leave them to cool. Enjoy!